A legacy export utility called "InstallLegacyExportTool.exe" is included with the application dsAppManager in a folder "C:\Program Files (x86)\Dimensional Solutions\DSAppManager\DSLegacyExport\Setup" folder.
Installing this utility and launching the application provides for a way to export the binary files created in legacy Foundation3D (version 6.5.0 or older), legacy Mat3D (version 6.5.0 or older) and legacy Shaft3D (version 5.6.0 or older) to Microsoft Excel format. The Excel file thus created can then be imported into Foundation3D, Mat3D and Shaft3D.
Installation:
Double-click on "InstallLegacyExportTool.exe" to launch the installation of the utility. After a successful installation, a folder called "DS Legacy Export" is created under "C:\Program Files (x86)\Dimensional Solutions". This folder contains a file called "ExportData.exe", which is the application used to export the legacy Foundation3D, Mat3D and Shaft3D binary files to Excel format.
ExportData:
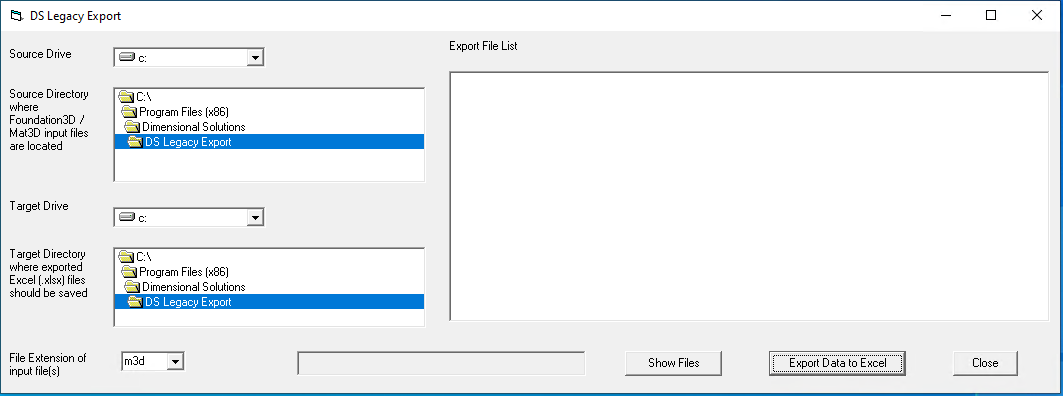
Double click ExportData.exe to launch the utility. A message "The Source directory path in ExportDataFolderLocation file not exist" displays. Click OK to display a window called "DS Legacy Export".
Select the source directory or folder location where legacy Foundation3D files (.exh, .hvs, .vvs, .mcs) are located or legacy Mat3D files (.m3d) files are located.
Select the target directory or folder location where the export file(s) (.xlsx) files should be created.
Select the file extension of the legacy Foundation3D file (.exh, .hvs, .vvs, .mcs), legacy Mat3D file (.m3d) or Shaft3D file (.s3d) which would be used to generate the Excel output file.
After these are selected, click the "Show Files" button. All the files of the specified file extension in the source directory will be displayed in the "Export File List" box. Using the Ctrl key on the keyboard, select one or more files from this box. Click "Export Data to Excel" to generate the output file in Excel (.xlsx) format. After a successful export, the Excel file will be placed in the specified target directory.
Note: To generate the Excel file, Excel must be installed on the computer.
Depending on the size of the input file, the export to Excel can take several minutes. Therefore it is recommended to export only the required input file from the list of several files displayed in the Export File List. A progress bar indicates the export process. Upon successful export, a success message displays.